|
Reading music while playing a keyboard percussion instrument can be a big challenge for young musicians. Here are some thoughts on how to help your percussionists become better readers. WHY KEYBOARD PERCUSSION IS DIFFERENT
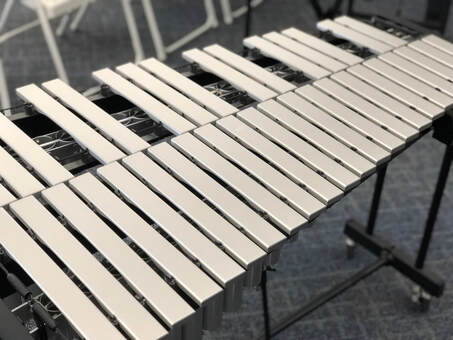
In certain ways playing keyboard percussion is the complete opposite of most wind instruments. Tone production is not a challenge; you can easily play the full range of the instrument the very first time you try. However, reading while playing is very hard since beginner percussionists need to look at their instrument whereas wind players can simply feel with their fingers and read their music. Between looking at the music, watching the conductor, and checking their beating spot, young percussionists have to learn how to move their eyes between three different places (some of which are very far apart)! Adding to the challenge is the fact that bells, xylophone, marimba and vibraphone all have bars of varying widths. Some students practice at home on a small instrument and play in school on a much larger one. Imagine a young clarinetist having to switch between instruments where the spacing between the keys was different every time. Another significant difference is that keyboard percussionists don't physically touch the instrument while they play. Since they use a mallet to strike the bars young players need to develop a "feel" through repetition and experience. As a result of these challenges young percussionists frequently wind up memorizing their music since reading it is so hard. They prefer the comfort of looking at the instrument instead of the music since they are afraid of playing a wrong note. And who can blame them! 6 WAYS TO HELP 1. Do lots of reading. Start with short, simple, step-wise exercises that have a limited range. The more they read the more comfortable they will be. This book is perfect for that. (You can use a Bb book to let them play in easier keys or the C book for more common band keys.) 2. Play lots of scales in chunks. (Handouts here) As they play up and down the keyboard more and more your students will begin to develop a "feel" for the instrument. After a while they won't feel the need to look down as much. 3. I always tell my percussionists "set your mallet above your beating spot, and look up." If the mallet is over the note they want to play then all they need to do is snap their wrists. Sometimes, in order to get them to trust themselves, I'll have them set their mallets over a note, then have them close their eyes and wait a couple seconds. On cue they will snap their wrists to play the note and usually they play the note correctly. This is a reminder that they don't need to look down the whole time they are playing. 4. Lower the music stand! When students are just beginning to learn to read place the music stand just above the bars as close as it can be without blocking their beating spot. This will help them use their peripheral vision to see the bars while they read their music. Gradually raise the stand as they get more comfortable so they can also see the conductor. 5. Use Say it, Fingers, Play it. Using their fingers allows young students to literally feel the notes they are going to play before they pick up their mallets and play. It helps them make a stronger connection in their brains, and develop a comfort level. Also, it helps them focus on reading the music first rather than stopping and hunting for notes. I usually encourage my students to put down their mallets and use their two index fingers. This has the added benefit of helping them figure out what stick pattern will work best, 6. Develop feel and peripheral vision. If the music moves mostly by step then players only need to move their mallet a little bit to play the next note. Have your students play up and down a scale slowly (they can repeat each note 2-4 times to make it easier) and feel how small the motion is when changing from one note to the next. They can even try it with their eyes closed. Then they can try doing this while keeping their eyes fixed on the music stand so they are playing the scale without looking down. They can use their peripheral vision to make small adjustments if needed. Start in C major and progress to scales that have more accidentals. As they continue they will develop the ability to use their peripheral vision and play expanded intervals. I hope these tips work for you. If you give them a try let me know how it goes, and let me . know if you have any questions!
1 Comment
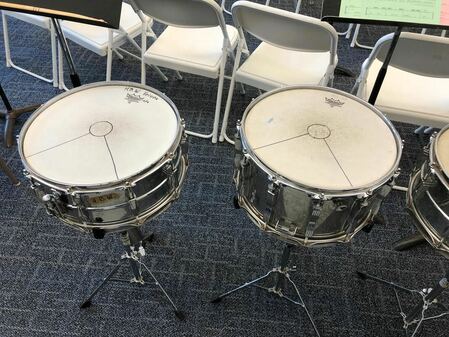
Tip #1 Having trouble with your percussionists' sticks flying out of control when they play snare drum? Using a permanent marker, outline a small circle (1-3 inches) in the center of the drum head. From there trace lines to the rim to guide their hand position. This will help them focus on where to place their hands and find the optimal beating spot. Tip #2 Our group rehearses in a carpeted room, however we perform in a "gymnatorium" with hardwood floors. As a result the percussionists have a huge adjustment to make, particularly on snare drum. What sounds good in the band room is WAY too loud in our performance space.
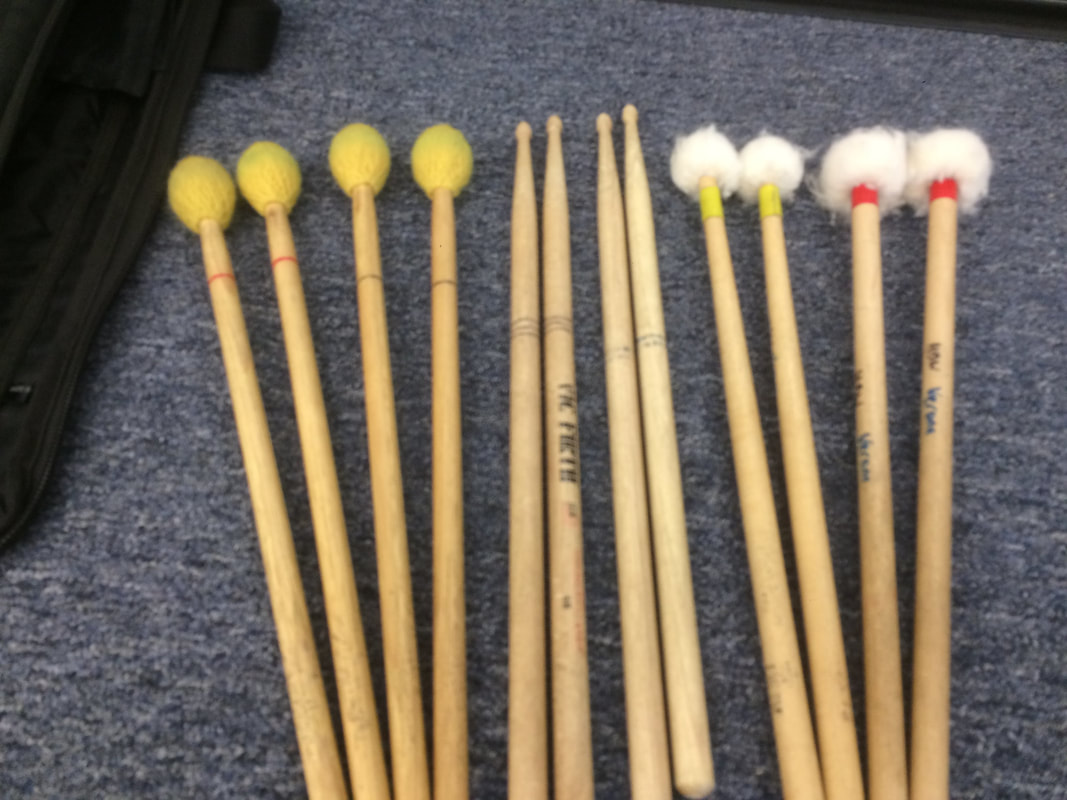
The solution? A drum rug (or a small piece of carpet) under the snare drums makes a dramatic difference. The percussionists are able to achieve a better balance and don't have to work so hard to play softer. No one notices the rug is there since it is on the floor in the back of the ensemble, but it soaks up enough of the sound that the drums are not overpowering. Bonus Tip Whenever you change a snare head use a permanent marker to write the date near the edge. That way you will know how long the head has been on the drum and will have a better idea of when to change it again. I always like to organize sticks and mallets so it's easy to keep matched pairs together. One easy way to do this is to use a permanent marker and draw a line or pattern around the stick. Make sure each pair has the same pattern in the same part of the stick. You can vary the color, spacing, or placement of the line so it's easy to find a matching pair. You can also use tape, but remember that this will affect the weight and feel of the stick or mallet.
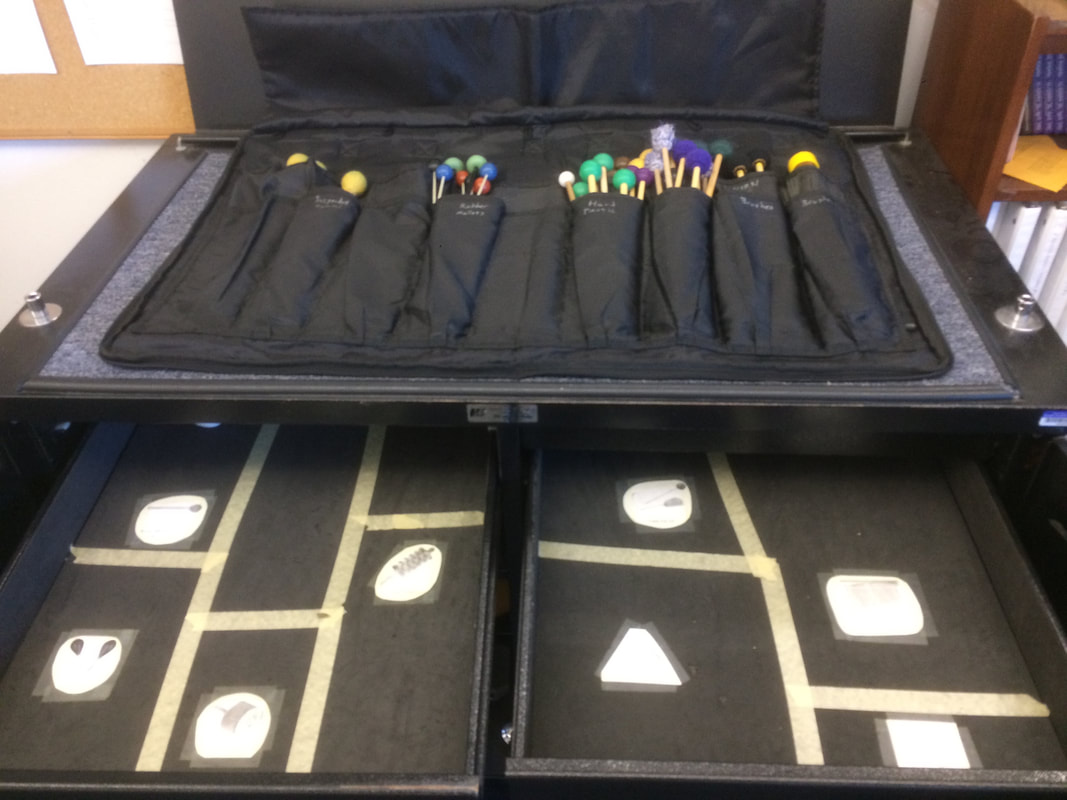
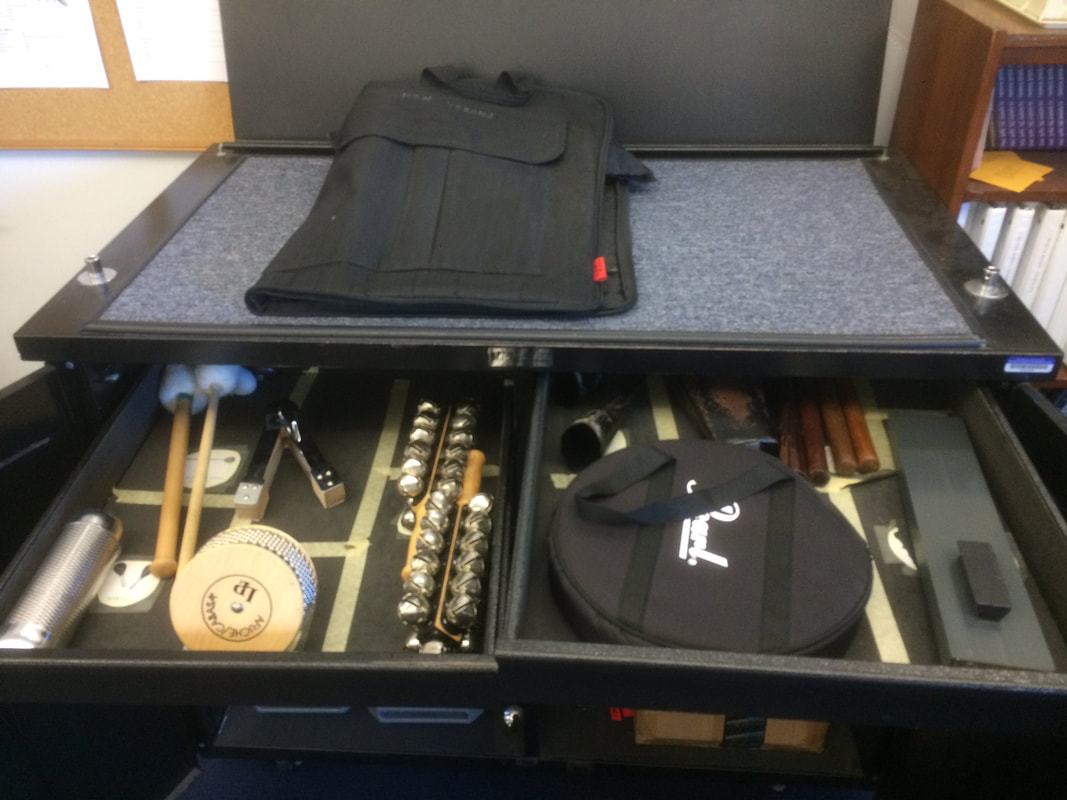
Welcome to The Band Teacher's Bag of Tricks! This blog will be a space to share thoughts and tips that have worked for me in my 17+ years of teaching band. For starters, here is a tip for organizing percussion storage. Percussionists (myself included) are not always great at putting things away where they belong. A few years ago I had had enough and came up with a solution. Since then I have never had to worry about missing instruments or equipment. I outlined space for each instrument in the percussion cabinet using masking tape. Then I taped pictures to label each section. Even the most disorganized percussionist could figure out where things went. You could easily do this on storage shelves if you don't have a percussion cabinet. I also used a paint marker to label each sleeve of our large stick bag ("yarn, hard plastic, suspended cymbal, brushes," etc.). Now we don't have to worry about missing mallets since they always go back in the same place. I recommend using separate bags or cases for timpani mallets and bass drum beaters.
Bonus tip: I highly recommend having a case for smaller percussion instruments like tambourine, triangle, and triangle beaters. It sends your students a message that they are instruments that need to be cared for. Just like a trumpet goes in its case after rehearsal, so does the tambourine, triangle, etc. If you don't have cases already Steve Weiss Music has good quality cases that are not expensive at all. They are totally worth a few $ to prolong the life of your percussion instruments. |
Tips for Band TeachersPractical ideas for your elementary and middle school band class. Archives
August 2019
Categories
All
|
© Dan Halpern Music 2023 All Rights Reserved
 RSS Feed